Wings Cowl
6 years ago

Two new little girls, one on the way and one that has arrived! These are simple little taggie blankets. I used iron on letters for a small message to them. For the welcome blanket I did a bit more quilting than the one for Cora (who is 12 days old). 
Here is a full view and peak of the back side. The lettering is a bit more subtle than I would have liked but it does add some texture to tummy time. Most exciting for me was the chance to make girl things!
This runner completes a wedding gift for a friend, the cocktail napkins were the other component. I did some freestyle embrodiery on the end of each side of the runner...
Here is the 'long shot' view, which isn't that great but a full view of the runner actually looks really dull becuase the embrodiery blends in. I used a linen on the top and dotted teal and brown for the backing. I love the way that linen drapes, it's so nice.
And, have been using this method since the Cash and Presley days. Their images are all over Nashville and even grace the cover of my conference brochure. I love the care it takes to work letterpress and the beauty of the handcraft it imparts.
These great images are taken from a gallery in Canada called Uppercase, which featured Hatch Print Shop at their gallery a while ago. Check them out at http://www.uppercasegallery.ca/hatch-show-print/ for all kinds of inspiring artwork.

And...the inside is lined so it has raw edges, argh!
I do like the button and latch portion. This was my first attempt at sewing my own button hook and I like it. So, I guess that worked out well. I does serve the purpose though of funking up my sad old checkbook. So, I can't say everything went wrong.
I made it a bit like a quilt with cotton batting in between and flannel on the backside. But, didn't do any additional quilting because I liked the fabric design and didn't want to mess with it. For the height listing I used textile ink and rubber number stamps from A Little Goodness. At each foot I made a stuffed animal that marks 'just how big you are getting'. These were appliqued onto the flannel and then stuffed with poly fiberfill. For the hanging device, daddy-o drilled holes in a dowel rod and I put Martha Stewart brand baker's twine through it with a little button tied to the other end to keep it in place. We will have to measure it's height from the ground when we install it but after that we can measure away! He's already 31 inches tall so we are a little behind. I can't wait for it to fill up with our chicken scratches. 
Now that these are sent I can post about them. I made these 'cd cases' for a mixed cd sent to a group of girlfriends from college. They are super simple, no overcast sewing with just a tiny bit of lining at the top to hold the elastic in place. I just went for it, didn't even write down my measurements. The buttons are, again, from my mom's old vintage stash. Someday I will run out of these and be very, very sad. The close up is a bit wonky, it's isn't slanted...just a funny picture.
Below is my first custom order...ever! A coworker saw my klean kanteen koat and put in a request. I was thrilled to accomodate. Same technique as I used before except I finally got smart and sewed with a piece of paper under the sticky side...that way it didn't stick to the machine. Made it an awful lot easier. Button is also from my vintage hunt. 

It definitely veers toward the funky rather than the sweet, which I hope isn't a let down for my swap mates. I also got an assortment of buttons...there were more than I had time to wade through.
This fabric is one of my favorites. Fantastic, right?
Kieran says I'm going to have to stop saying that I don't have a local fabric store. It might be true though it's definitely not your traditional place to get fabric.
I got the idea from a gift from my sister, she got us holders to replace the cardboard they give you at the coffee shop. Hers were off etsy from dizzlepop. But, they don't fit the Klean Kanteen. I made ours with plain cotton on the outside and a middle liner of cotton quilt batting. But, the genius part is that the backside is sticky so it grips the container! I used the material used for making feet on children's pajamas to get that effect. It's very effective, much to my delight. The buttons are, of course, vintage from my mother. And, I love them.
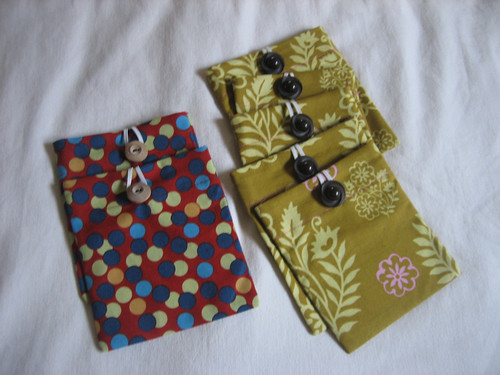
So, turns out I don't actually have any personal restraint. I bought the 'cute stuff' book on impulse in Barnes and Nobles (damn their train table, it draws us in every time.) and the cherry bag handles were half price on etsy from sweetflavor. The other book, remake restyle, reuse, I wouldn't actually recommend. It should be called "how to dress us boring things you bought at Ikea" rather than the vaguely environmental title it carries. So, don't purchase it but if you want to borrow it let me know.
No, we aren't expecting. This little cutie is for an upcoming baby shower for a guy at my office. He and his wife have been trying and trying and are finally, securely and happily pregnant with a baby girl! They are so thrilled, it contagious. So, using a tutorial recommended by Capers and Olives, I made this top out of a thrift store shirt. It is so soft and gauzy from being previously loved, it's perfect. The tutorial and many others are here.
I'm feeling somewhat reinvigorated after finishing this bag. It's from Bend the Rules and it was more challenging than alot of the other projects in the book. And, while I like it alot it is pretty saggy as a bag. And, that is with using much stiffer lining than the book called for. But, I like the fabric combination and feel like I will use it. I added a button because it seemed like it needed something to keep it a bit secure. The button is a bit crooked, which will forever drive me crazy...but I'm trying to let it go. I'd love a comment, it's so nice to hear from people. Or email me at mmquaal [at] yahoo [dot] com.Especially if you want to use a picture or are inspired by an idea!